Personas advanced customizations
Adding a New Section
Personas by UserBit is fully customizable. You can structure each persona based on your research needs by adding different types of sections.
This allows you to go beyond basic profile details and create rich, well-organized persona documents.
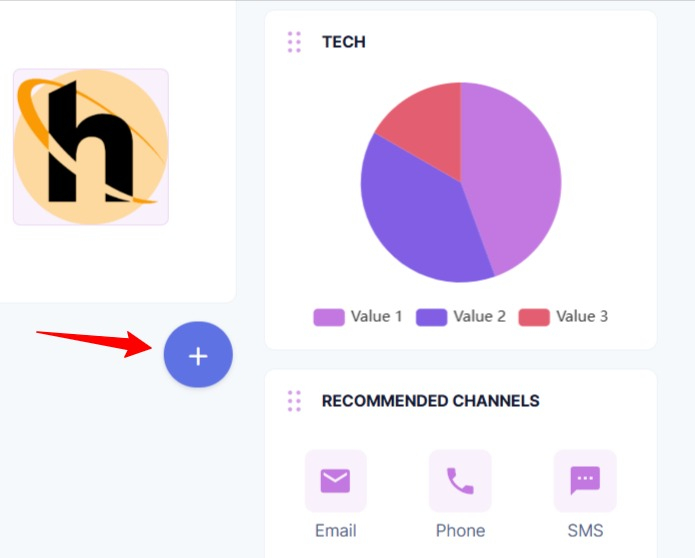
To add a new section, open the persona you want to edit and click on (+) Add New Section.
A panel will appear where you can select the type of section you would like to insert.
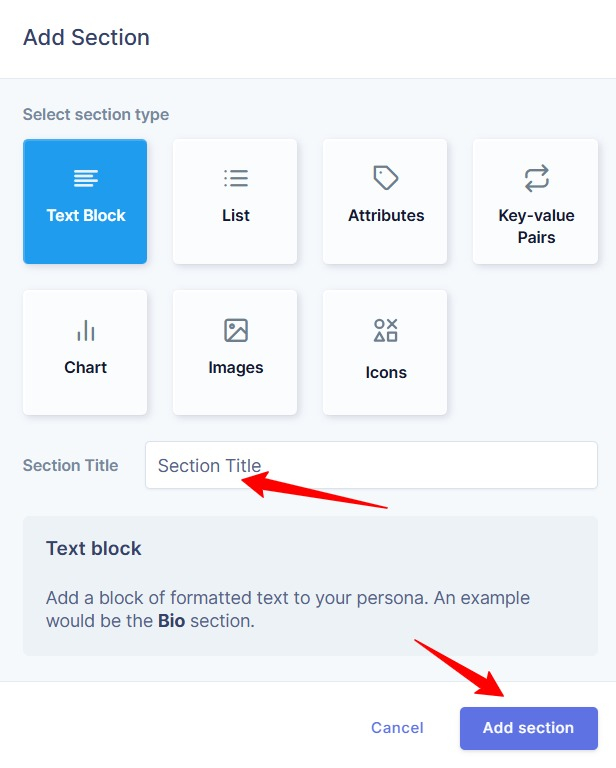
After choosing the section type, enter a Section Title and click Add Section to confirm. The new section will then appear in your persona, ready for you to add content.
Available Section Types
You can choose from the following section types:
-
Text Block: Add formatted text to describe background, bio, behaviors, motivations, or any narrative content.
-
List: Present information in bullet or structured list format, ideal for goals, frustrations, or needs.
-
Attributes: Define key characteristics such as demographics, skills, or personality traits in a structured format.
-
Key-value Pairs: Display clearly labeled information in a clean two-column format. For example, Age: 34, Location: New York, Role: Product Manager.
-
Chart: Add a simple visual representation of quantitative insights. For example, skill proficiency, feature usage, or other measurable data points.
-
Images: Add contextual visuals or supporting imagery to enrich the persona.
-
Icons: Use visual symbols to highlight important attributes or behaviors.
Each section type is designed to present information in a different format, helping you organize persona details clearly and consistently.
Managing Persona Groups
As your persona library grows, groups help you keep everything organized. You can use them to structure personas by segment, project, market, or any system your team follows.
In Personas by UserBit, groups are flexible. You can create them anytime, move personas between them, or delete them without losing any data.
Creating a Group
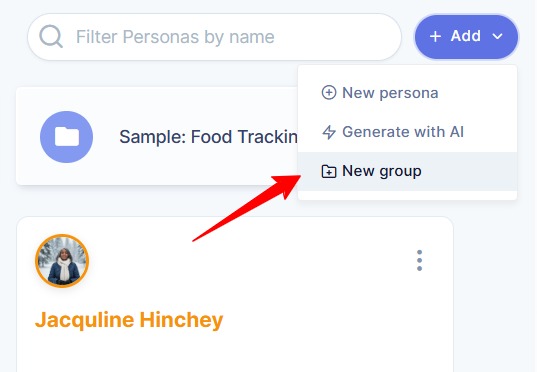
To create a new group, go to your workspace and click on the Add button. From the dropdown menu, select New Group.
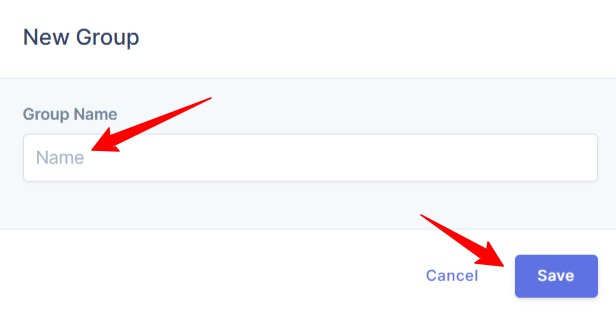
Give your group a name and click Save. Your new group will immediately appear in the workspace, ready to be used.
Once a group is created, you can add an already existing persona or create a persona directly inside it.

Open the group and use the Action button to create a new persona. You can either:
-
Create a persona manually, or
-
Generate a persona using AI
The persona will automatically be added to that group, helping you stay organized from the start.
Adding a persona to a group
If you already have existing personas and want to organize them, you can easily move them into a group. To add a persona to a group click on the three-dot (⋮) icon on the persona card and select Move.
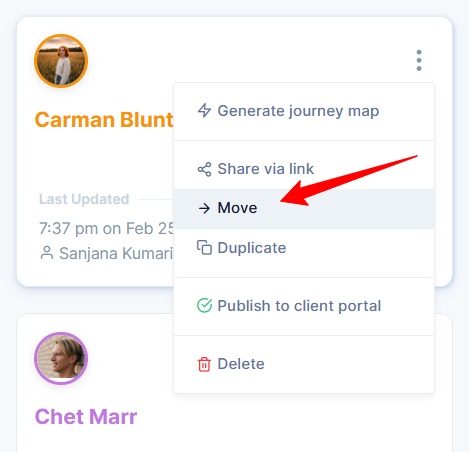
You’ll be able to choose from your existing groups or create a new group right there.
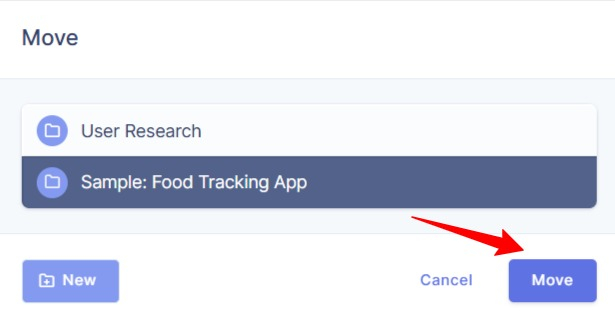
Your persona will be added to the group.
Deleting a group
If you no longer need a group, open it and click on the Action button in the top-right corner and select Delete group from the dropdown menu. The group will be deleted.
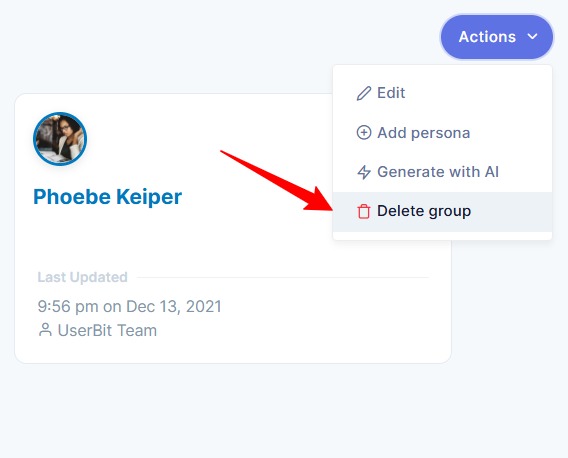
Deleting a group does not delete the personas inside it. They simply move back to your main workspace, so nothing is lost.
Duplicating a persona
You don’t need to start from scratch every time. You might want to create a variation of an existing persona, reuse the same structure, or build a similar profile for a different segment.
The duplicate persona feature allows you to quickly create a copy and customize it as needed.
To duplicate a persona, click on the three-dot (⋮) icon on the persona card. From the dropdown menu, select Duplicate.
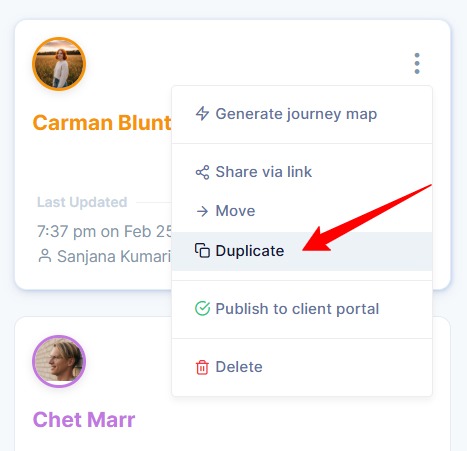
Then you can choose what you would like to copy:
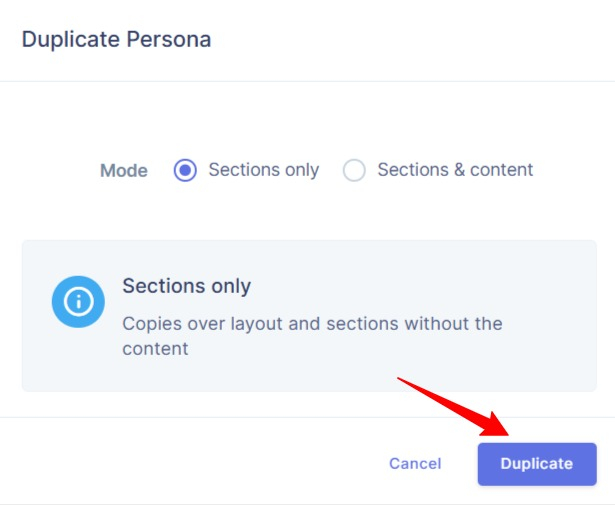
-
Sections only – This copies the layout of the persona without the existing content.
-
Sections and content – This creates a complete duplicate, including all filled-in details.
Duplicating helps you save time, maintain consistency across personas, and quickly build variations without rebuilding the entire structure again.