Workspaces
Tags
Analysis
AI
People
Interviews
Notes & Media
Transcription
Editor
Personas
Card Sorts
Journey Maps
Flow Diagrams
Client Portal
Share
Integrations
Team
Single Sign-On
Subscription
Workspaces
Tags
Analysis
AI
People
Interviews
Notes & Media
Transcription
Editor
Personas
Card Sorts
Journey Maps
Flow Diagrams
Client Portal
Share
Integrations
Team
Single Sign-On
Subscription
Updated on February 1, 2023
Configure Single Sign-On (SSO) with Azure
For setting up single sign-on with Azure Active Directory, create a new non-gallery enterprise application for UserBit.
Then in your setup for SAML based single sign-on you'll need the following:
Step 1
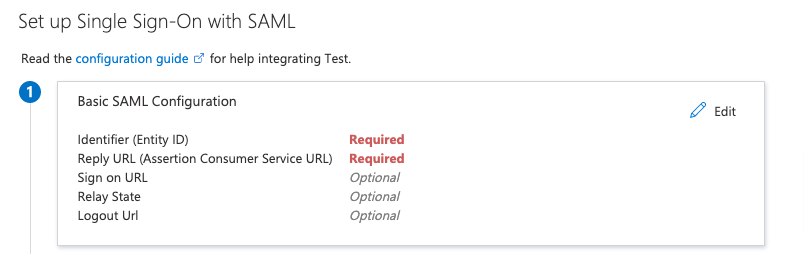
Enter entity ID & Reply URL
https://userbit.com
Reply URL (Assertion Consumer Service URL) :
https://userbitapp.firebaseapp.com/__/auth/handler
Leave the other optional items blank.
Step 2
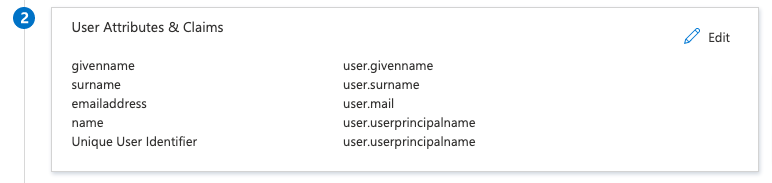
Enter entity ID & Reply URL
We only require user's name and email, you can leave this as is if you want.
Steps 3 and 4 contain the information we need from you:
- Company Name: Something your employees will recognize (Ex: Google, Inc.)
- Provider Entity ID: Unique identifier for your Identity Provider. You can get this from step 4
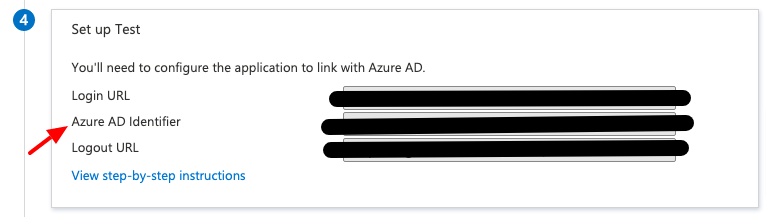
Azure AD Identifier
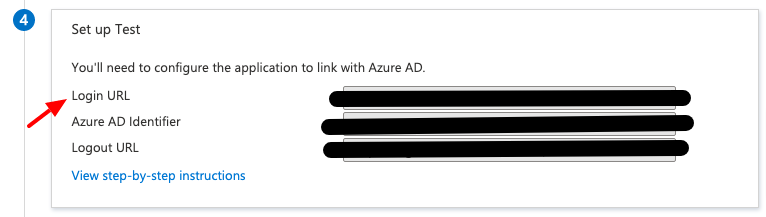
Login URL
"-----BEGIN CERTIFICATE-----"
, and end with
"-----END CERTIFICATE-----"
. You can get it from step 3:
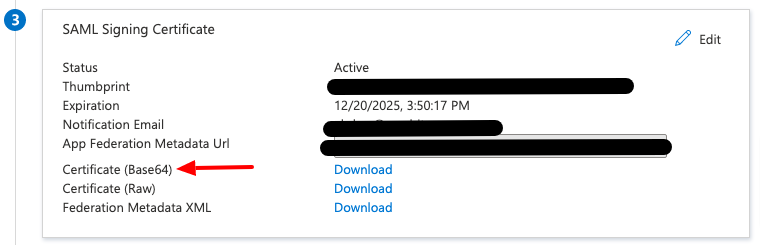
Certificate (Base64)
Once set up on both ends, employees will be able to use their Azure credentials to log into UserBit.